Best Practices for Vinyl Siding Installation in Fort Wayne, Indiana (2026)
Best Practices for Vinyl Siding Installation in Fort Wayne, Indiana (2026)

Best Practices for Vinyl Siding Installation in Fort Wayne, Indiana (2026)
When homeowners think about siding replacement, most focus on one thing:
How will it look when it’s finished?
While appearance matters, what matters even more is how the siding is installed.
A siding system does much more than improve curb appeal.
It protects your home from:
- Water intrusion
- Moisture damage
- Energy loss
- Mold and rot
- Pest infiltration
At Faze Construction, we believe proper installation is what separates an average siding job from a great one.
Let’s break down the best practices for vinyl siding installation in Fort Wayne, Indiana.
Step 1: Remove Existing Siding Down to the Substrate
The best practice for siding replacement starts with a full tear-off.
This means removing all existing siding down to the substrate underneath.
This substrate is typically:
- OSB decking
or - Blackboard/sheathing
Whenever possible, full removal is preferred because it allows for a complete inspection of the wall system underneath.
This helps identify:
- Rot
- Water damage
- Mold
- Structural issues
OSB is typically preferred because it offers better nail retention over time compared to blackboard.
Strong substrate means better long-term siding performance.
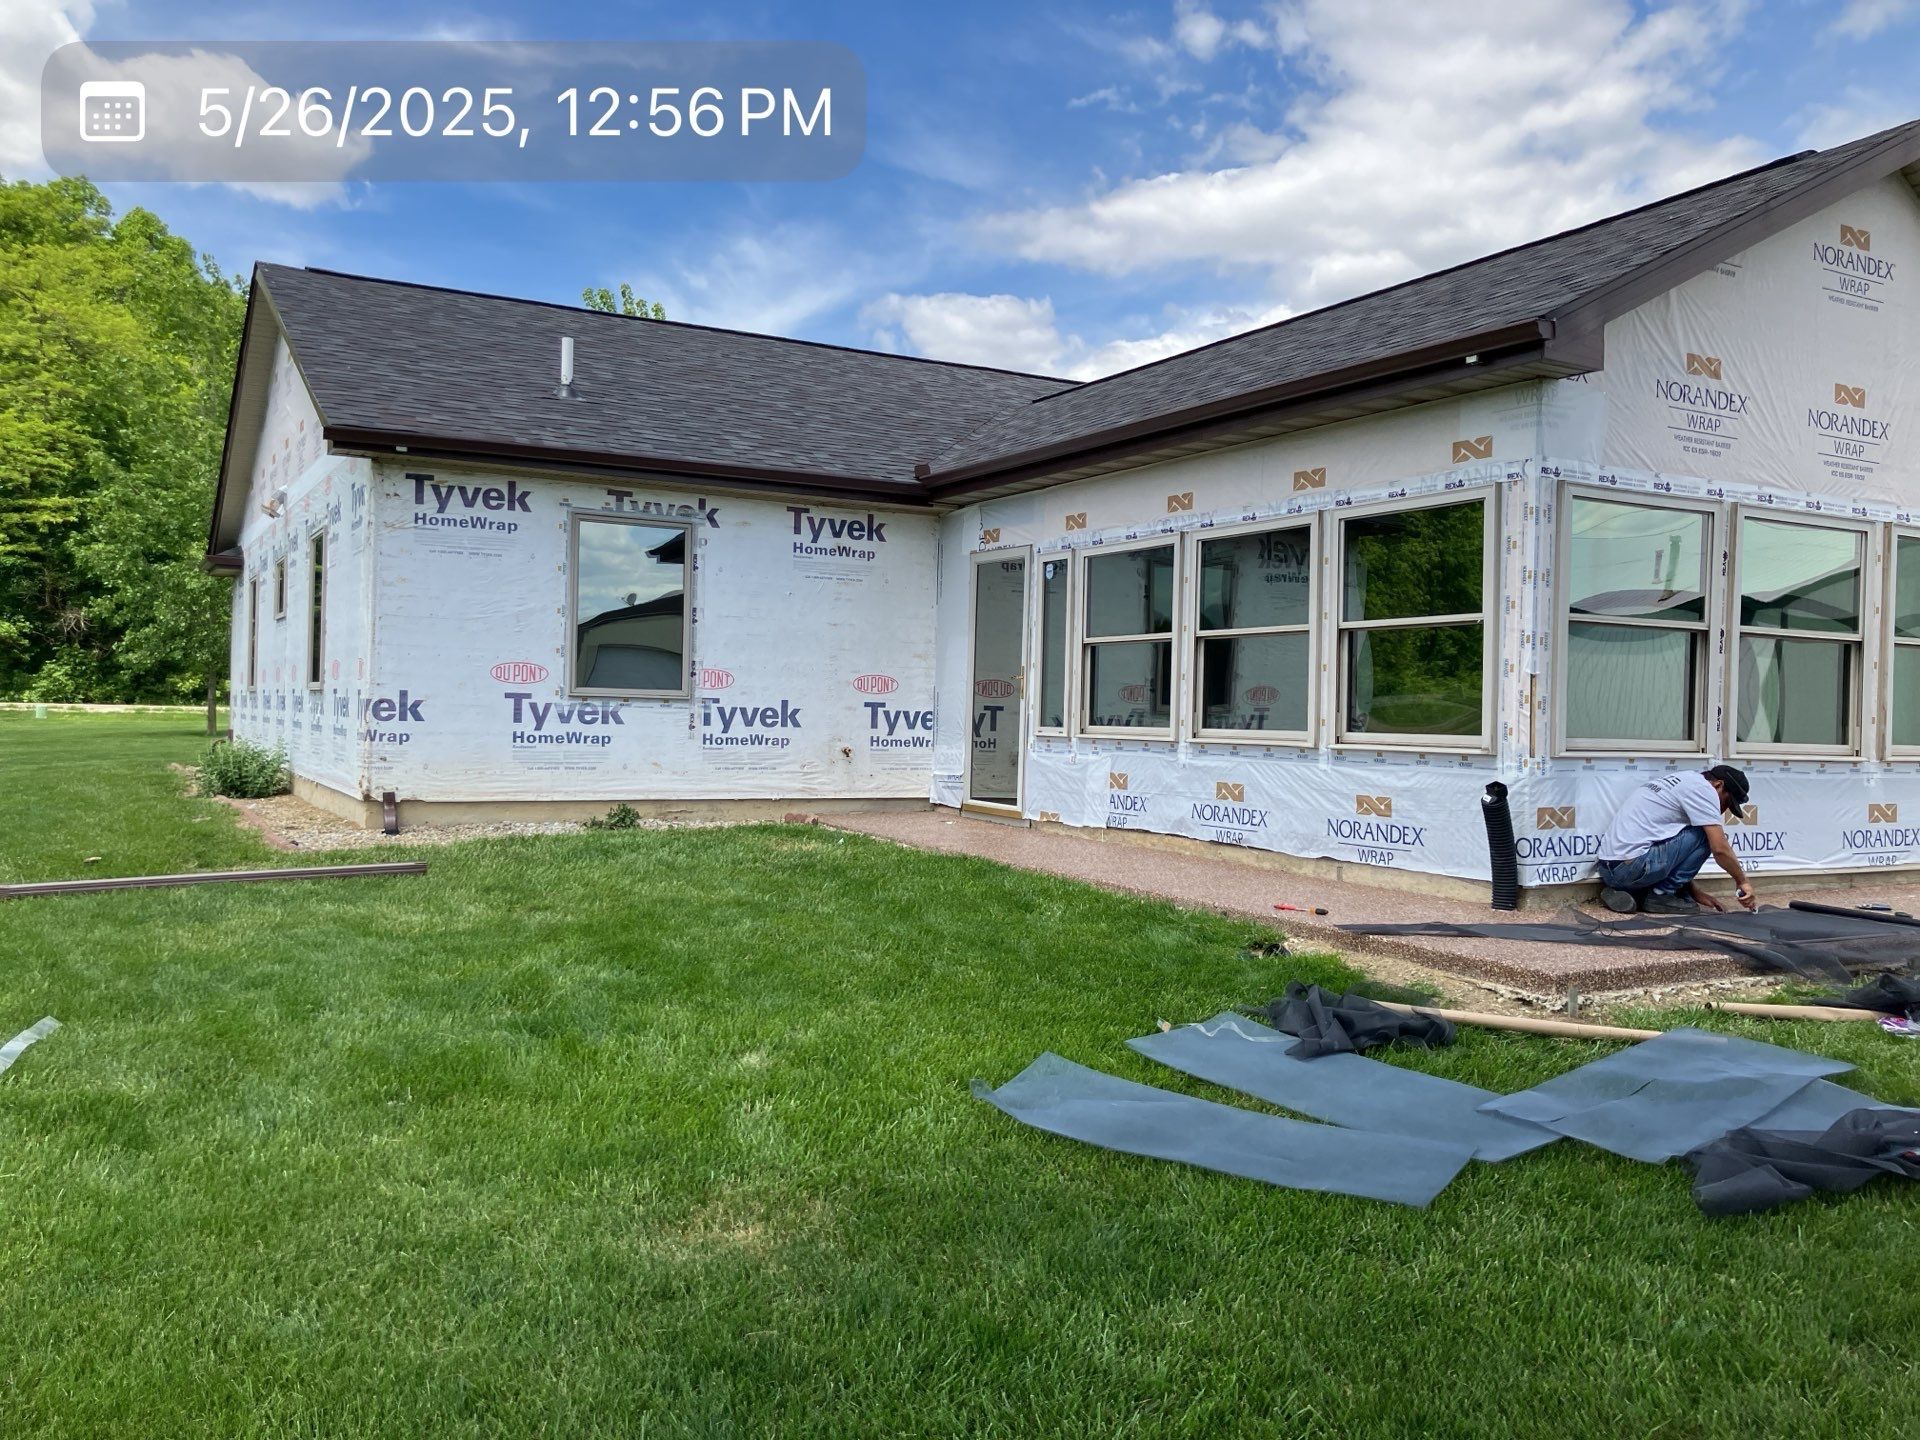
Step 2: Install House Wrap Moisture Barrier
After the substrate is inspected and repaired, the next step is installing a moisture barrier.
This is commonly called house wrap.
House wrap is installed across all wall surfaces and serves as a protective barrier against moisture intrusion.
Its job is to:
- Block water from entering
- Allow walls to breathe
- Improve moisture management
This creates a major layer of protection behind the siding.
Step 3: Flash Windows Properly
Window areas are one of the most common failure points in siding systems.
That’s why proper flashing is critical.
After house wrap is installed, window openings are cut out and flashing tape is applied around the window openings.
Best practice includes:
- Proper side flashing
- Proper bottom flashing
- Proper top flashing
Flashing tape should be installed to ensure water is redirected outward rather than trapped behind the siding.
This is one of the most important waterproofing steps in the installation process.
Step 4: Install Starter Strip & Accessories First
Before installing siding panels, all accessory components should be installed first.
This includes:
- Starter strips
- Corner posts
- J-channels
- Utility trim
- Other trim components
The starter strip is what locks in the first row of siding and helps establish straight installation.
Starting with properly aligned accessories creates cleaner, stronger installation throughout the project.
Step 5: Proper Siding Installation & Staggering
Once the prep work is complete, siding panels can be installed.
Best practice is to stagger siding seams to create a cleaner appearance and improve overall performance.
Common stagger methods include:
- Stair-step pattern
- Alternating stagger pattern
Proper staggering improves:
- Appearance
- Balance
- Visual consistency
This helps create a more professional finished product.
Step 6: Nail for Thermal Expansion & Contraction
This is one of the most important parts of vinyl siding installation.
Vinyl expands and contracts as temperatures change.
In Fort Wayne, homes experience:
- Hot summers
- Cold winters
- Major seasonal temperature swings
Because of this, siding should never be nailed tightly to the wall.
Best practice is leaving approximately 1/4-inch clearance between the nail head and the siding.
This allows room for:
- Expansion
- Contraction
- Natural movement
Without proper spacing, siding can:
- Warp
- Buckle
- Crack
Proper fastening prevents these issues.
Step 7: Proper J-Channel Installation
J-channel is the trim installed around:
- Windows
- Doors
- Rooflines
- Top wall transitions
These areas need special attention.
Best practice is to miter corners whenever possible.
Mitering means interlocking corners cleanly to improve:
- Appearance
- Water management
- Durability
Properly installed J-channel creates a cleaner and more watertight finish.
Step 8: Install Flashing at Critical Water Points
Flashing is essential in siding systems.
Its purpose is simple:
Move water out.
Critical flashing points include:
- Above windows
- Above doors
- Around decks
- Transition areas
Drip Cap Above Windows
Drip cap flashing is installed above windows to direct water away.
If water gets behind the siding, the system should work in layers:
- Drip cap redirects water
- Flashing tape provides backup protection
- House wrap moves water downward
- Water exits safely
This layered system protects the home.
Door & Deck Flashing
Flashing around doors and deck connections is equally important.
These areas are common leak points if not handled correctly.
Step 9: Seal Critical Areas Properly
Caulking and silicone play an important role in siding installation.
They should be used at critical seal points to prevent water intrusion.
Common areas include:
- Trim transitions
- Penetrations
- Gaps around accessories
Proper sealing helps improve water resistance and long-term performance.
Step 10: Keep Weep Holes Open
This is often overlooked.
Vinyl siding is designed to breathe.
It sheds water and allows moisture to escape through built-in weep holes.
These weep holes must remain open and unobstructed.
Blocking them can trap moisture behind the siding and lead to:
- Mold
- Rot
- Water damage
Keeping them clear is essential for the long-term health of the siding system.
Why Proper Siding Installation Matters
Many homeowners compare siding products.
But product is only part of the equation.
The truth is:
Even the best siding product will fail if installed incorrectly.
Proper installation protects against:
- Water intrusion
- Rot
- Mold
- Energy loss
- Structural damage
That’s why choosing the right contractor matters.
Work with a Siding Contractor That Installs It Right
At Faze Construction, we don’t just install siding.
We install complete exterior systems designed for long-term performance and protection.
Our team focuses on:
- Proper preparation
- Moisture management
- Flashing
- Quality installation
- Long-term durability
If you’re considering siding replacement in Fort Wayne, Indiana, our team is here to help.
Schedule Your Siding Inspection Today
Contact Faze Construction today for a professional siding inspection and learn how to protect your home with a properly installed siding system.
Like This Post? Feel Free To Share It...
More Marketing Tips, Tricks & Tools
Our Blog Here At Faze Construction